Distracted Driver Detection
CLICK HERE to download the project proposal
CLICK HERE to download a zip folder containing test images of drivers
Motivation(Why I chose this project):
Driving a car is a complex task, and it requires complete attention.The National Highway Traffic Safety Administration (NHTSA) reported that 36,750 people died in motor vehicle crashes in 2018, and 12% of it was due to distracted driving. Fortunately, technology is adapting to help keep today’s drivers, I believe that computer vision can augment the efforts of the governments to prevent accidents caused by distracted driving. An app that can capture realtime images of the driver and alert them if they are distracted within seconds with the ease of a button click can prove to be beneficial by greatly bringing down mishaps.

What the app will look like:


Features supported by the App:
The app will allow user to upload a photo or capture real time photos of the driver, classifying it as distracted or not distracted within seconds with the ease of a button click
The app will classify the picture into one of the following normal driving, texting, talking on the phone, operating the radio, drinking ,reaching behind, hair and makeup , talking to passenger.
After classifying the image, the app will alert the driver or the passenger if he is distracted and pay attention on the road.
Explanation of a few algorithms:
Conv2D:
2D convolution layer (e.g. spatial convolution over images).
This layer creates a convolution kernel that is convolved with the layer input to produce a tensor of outputs. If use_bias is True, a bias vector is created and added to the outputs. Finally, if activation is not None, it is applied to the outputs as well.
When using this layer as the first layer in a model, provide the keyword argument input_shape (tuple of integers, does not include the sample axis), e.g. input_shape=(128, 128, 3) for 128x128 RGB pictures in data_format=“channels_last”. source
Below is a GIF showing the working of the Conv2D layer:

BatchNormalization layer:
Layer that normalizes its inputs.
Batch normalization applies a transformation that maintains the mean output close to 0 and the output standard deviation close to 1.
Importantly, batch normalization works differently during training and during inference. source
MaxPool2D:
Max pooling operation for 2D spatial data.
Downsamples the input representation by taking the maximum value over the window defined by pool_size for each dimension along the features axis. The window is shifted by strides in each dimension. The resulting output when using “valid” padding option has a shape(number of rows or columns) of: output_shape = (input_shape - pool_size + 1) / strides)
The resulting output shape when using the “same” padding option is: output_shape = input_shape / strides source
Dropout:
The Dropout layer randomly sets input units to 0 with a frequency of rate at each step during training time, which helps prevent overfitting. Inputs not set to 0 are scaled up by 1/(1 - rate) such that the sum over all inputs is unchanged.
flatten:
Flattens the input. Does not affect the batch size.
Dense:
Dense implements the operation: output = activation(dot(input, kernel) + bias) where activation is the element-wise activation function passed as the activation argument, kernel is a weights matrix created by the layer, and bias is a bias vector created by the layer (only applicable if use_bias is True). These are all attributes of Dense.
My Contribution:
I designed my own classifier from scratch. below is the architecture for the CNN model:
   Model: "sequential"
_________________________________________________________________
Layer (type)                 Output Shape              Param #
=================================================================
conv2d (Conv2D)              (None, 62, 62, 64)        640
_________________________________________________________________
batch_normalization (BatchNo (None, 62, 62, 64)        256
_________________________________________________________________
max_pooling2d (MaxPooling2D) (None, 31, 31, 64)        0
_________________________________________________________________
dropout (Dropout)            (None, 31, 31, 64)        0
_________________________________________________________________
conv2d_1 (Conv2D)            (None, 31, 31, 128)       73856
_________________________________________________________________
batch_normalization_1 (Batch (None, 31, 31, 128)       512
_________________________________________________________________
max_pooling2d_1 (MaxPooling2 (None, 16, 16, 128)       0
_________________________________________________________________
dropout_1 (Dropout)          (None, 16, 16, 128)       0
_________________________________________________________________
conv2d_2 (Conv2D)            (None, 16, 16, 256)       295168
_________________________________________________________________
batch_normalization_2 (Batch (None, 16, 16, 256)       1024
_________________________________________________________________
max_pooling2d_2 (MaxPooling2 (None, 8, 8, 256)         0
_________________________________________________________________
dropout_2 (Dropout)          (None, 8, 8, 256)         0
_________________________________________________________________
flatten (Flatten)            (None, 16384)             0
_________________________________________________________________
dense (Dense)                (None, 512)               8389120
_________________________________________________________________
batch_normalization_3 (Batch (None, 512)               2048
_________________________________________________________________
dropout_3 (Dropout)          (None, 512)               0
_________________________________________________________________
dense_1 (Dense)              (None, 128)               65664
_________________________________________________________________
dropout_4 (Dropout)          (None, 128)               0
_________________________________________________________________
dense_2 (Dense)              (None, 10)                1290
=================================================================
Total params: 8,829,578
Trainable params: 8,827,658
Non-trainable params: 1,920
    _________________________________________________________________

Test Accuracy achieved: 99.24%
score = cnnmodel.evaluate(x_test, y_test, verbose=1)
loss: 0.0308 - accuracy: 0.9915


Epoch 5/5
359/359 [==============================] - 5s 15ms/step - loss: 0.1366 - accuracy: 0.9569 - val_loss: 0.0308 - val_accuracy: 0.9924
Graph showing training and validation accuracy trend:

Graph showing training and validation loss trend:

Dataset:
we are given driver images, each taken in a car with a driver doing something in the car (texting, eating, talking on the phone, makeup, reaching behind, etc). our goal is to predict the likelihood of what the driver is doing in each picture.
LOADING THE DATASET

SPLITTING INTO TRAIN AND TEST

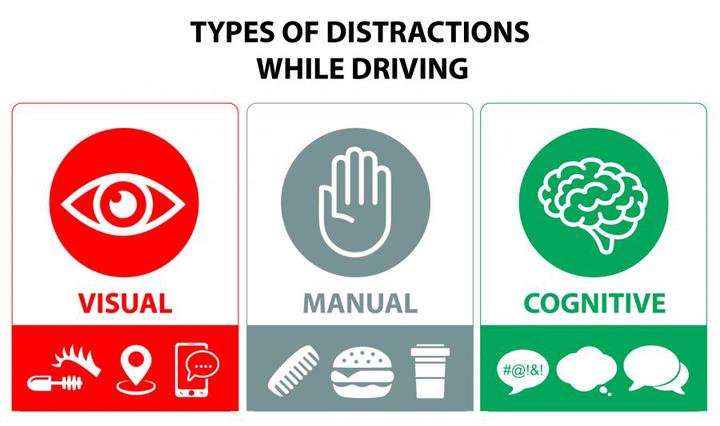
TYPES OF CLASSIFICATION


TYPE Data Visualization

LOADING THE TEST IMAGE AND RESIZING AND GRAYSCALING

CNN MODEL

ACCURACY

Challenges Faced:
Initially after training my model I noticed that the validation accuracy was too low (mid 60s). I then browsed other notebooks posted on Kaggle for this particular dataset. I came accross Louis’s notebook which explained that the data needs preprocessing and resizing. Following that tutorial i resized the images to 64 x 64 and converted it to grayscale. Also this Tutorial also introduced me to batch normilization. Add batch normilization and pre processing the data resulted in a significant jump in accuracy
Experiments and findings:
After experimenting with many different architectures for the CNN model I realised that adding the BatchNormalization layer after each Dense, and MaxPooling2D layer can help increase the validation accuracy. Addition of Dropout layers can help prevent overfitting.
References:
[1] https://www.kaggle.com/ismailchaida/cnn-to-detect-driver-actions
[2] https://www.kaggle.com/pierrelouisdanieau/computer-vision-tips-to-increase-accuracy
[4] https://keras.io/api/layers/normalization_layers/batch_normalization/
[5] https://keras.io/api/layers/convolution_layers/convolution2d/
[7] https://keras.io/api/layers/pooling_layers/max_pooling2d/
Saahil Anande
MS in Computer Science student at The University of Texas at Arlington
A Master of Science in Computer Science Graduate with a knack for problem-solving, passionate about developing solutions using and learning the latest object-oriented programming techniques and software engineering methodologies with Extensive experience in developing full stack applications and microservices in MERN, PERN stack and Spring boot.